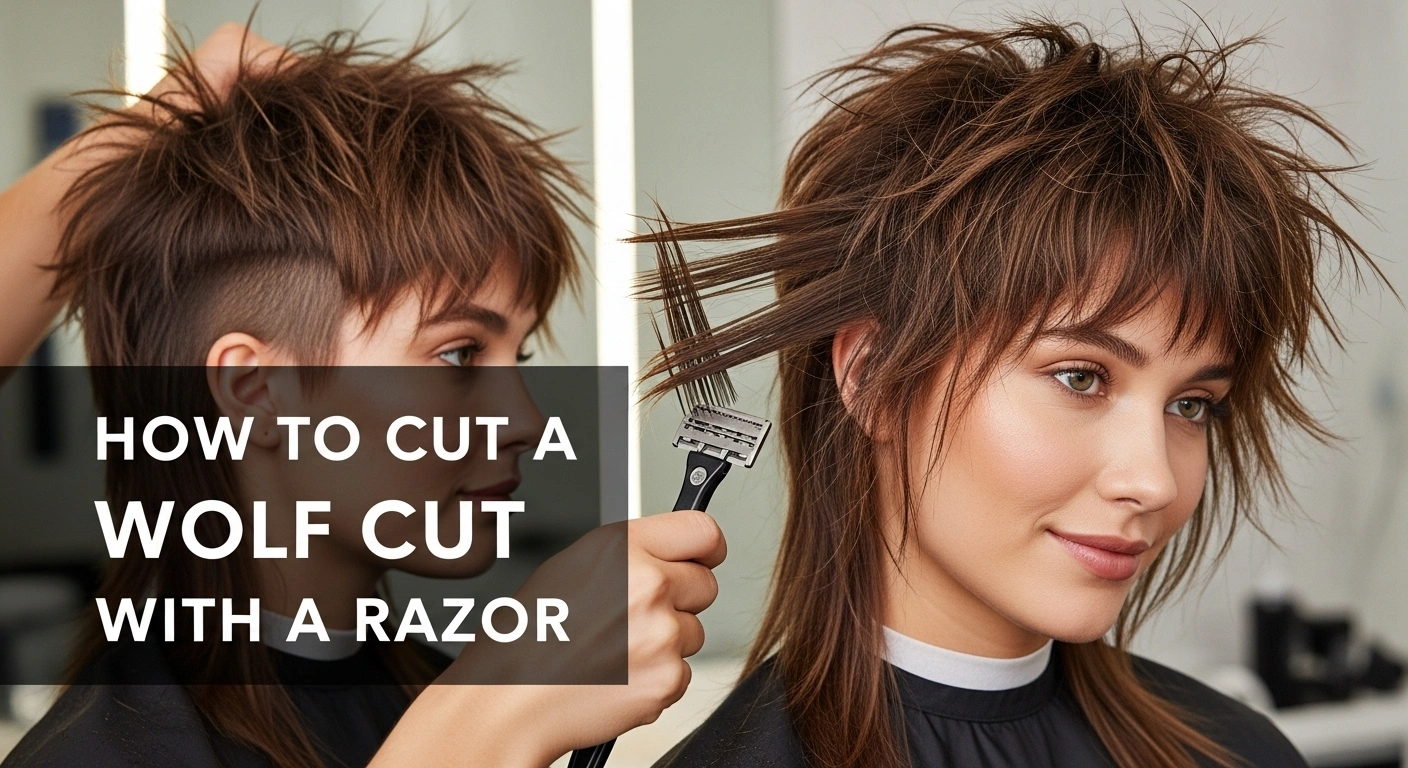
How to Cut a Wolf Cut with a Razor
The wolf cut has become one of the most requested hairstyles in salons worldwide, combining the shaggy layers of a 70s shag with the edgy disconnection of a mullet. Learning how to cut a wolf cut with a razor can help you achieve that effortlessly textured, rock-and-roll aesthetic that’s taken social media by storm.
This comprehensive guide will walk you through everything you need to know about creating a wolf cut using razor cutting techniques, from preparation to finishing touches.
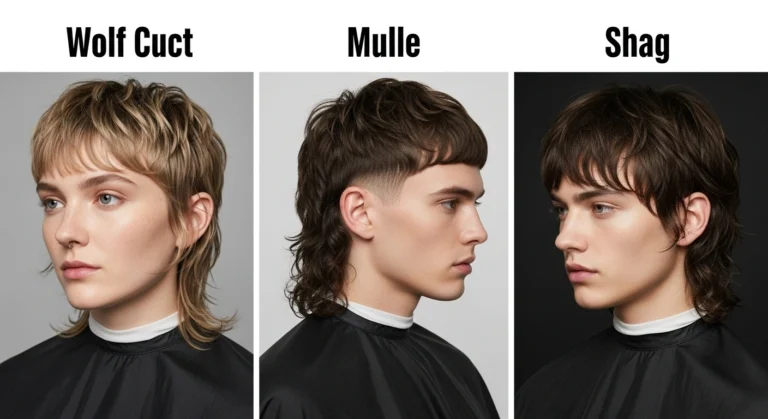
What Is a Wolf Cut Hairstyle?
The wolf cut is a hybrid hairstyle that blends choppy layers throughout the crown and sides with longer, disconnected lengths in the back. It features:
- Heavy layering around the face and crown
- Shorter top sections that create volume
- Longer lengths in the back (mullet-inspired)
- Textured, shaggy finish for an undone look
- Face-framing layers that accentuate cheekbones
The wolf cut works on various hair types and lengths, making it universally flattering when customized properly.
Why Use a Razor for Wolf Cuts?
Using a razor instead of scissors offers distinct advantages for creating the perfect wolf cut texture.
| Cutting Tool | Texture Result | Best For | Maintenance |
|---|---|---|---|
| Razor | Soft, feathered, textured | Fine to medium hair, creating movement | Requires frequent touch-ups |
| Scissors | Blunt, defined edges | Thick, coarse hair, precise lines | Longer-lasting cut |
| Point Cutting | Textured but controlled | All hair types, subtle texture | Moderate maintenance |
| Thinning Shears | Reduced bulk, softer | Thick, heavy hair | Low maintenance |
Razor Benefits for Wolf Cuts:
- Creates natural, lived-in texture instantly
- Removes weight without creating harsh lines
- Produces soft, feathered ends
- Enhances movement and flow
- Achieves the signature shaggy aesthetic
Essential Tools for Cutting a Wolf Cut with a Razor
Before you begin, gather all necessary tools and materials.
Required Tools
| Tool | Purpose | Recommended Type |
|---|---|---|
| Razor | Primary cutting tool | Feather razor or straight razor with guard |
| Razor Blades | Sharp cutting edge | Professional-grade, replaceable blades |
| Cutting Comb | Sectioning and guiding | Fine-tooth styling comb |
| Clips | Holding sections | Alligator or butterfly clips (6-8) |
| Spray Bottle | Keeping hair damp | Fine mist spray bottle |
| Cape/Towel | Protecting clothing | Waterproof cutting cape |
| Mirror | Checking angles | Handheld and wall-mounted |
| Styling Products | Finishing | Texturizing spray, mousse |
Optional But Helpful Tools
- Thinning shears for additional texturizing
- Hair cutting scissors for initial length removal
- Tail comb for precise sectioning
- Hair dryer for styling assessment
- Leave-in conditioner or detangler
Preparing Hair for a Razor Wolf Cut
Proper preparation ensures the best cutting results and prevents damage.
Hair Preparation Steps
- Wash and condition the hair thoroughly
- Towel dry until damp, not soaking wet
- Detangle completely using a wide-tooth comb
- Apply leave-in conditioner for slip and protection
- Keep hair damp throughout the cutting process
Important Safety Note: Always use a razor on damp hair, never on dry hair. Cutting dry hair with a razor can cause damage, split ends, and uneven results.
Hair Type Considerations
| Hair Type | Razor Technique Adjustment | Special Considerations |
|---|---|---|
| Fine/Thin | Light pressure, minimal passes | Risk of over-thinning; use sparingly |
| Medium | Standard technique | Ideal for razor cutting |
| Thick/Coarse | Firmer pressure, multiple passes | May need pre-thinning with shears |
| Curly | Cut when stretched or straightened | Razor on wet curls can cause frizz |
| Wavy | Standard technique | Enhances natural texture beautifully |
Step-by-Step Guide: How to Cut a Wolf Cut with a Razor
Follow these detailed steps to create a professional-looking wolf cut using a razor.
Step 1: Section the Hair
Proper sectioning is crucial for even layering and balanced results.
Sectioning Pattern:
- Create center part from forehead to nape
- Section horizontally at ear level (four quadrants total)
- Create top section from temple to temple across crown
- Secure sections with clips
Step 2: Establish the Guideline Length
Start by determining your shortest and longest points.
Guideline Instructions:
- Take a small section from the center top of the head
- Hold the section straight up (90-degree angle)
- Determine desired top layer length (typically 3-5 inches)
- Cut this guideline section with scissors or razor
- This becomes your reference point for all top layers
Step 3: Cut the Top Layers
The top layers create the volume and shape characteristic of a wolf cut.
Top Layer Technique:
- Work from front to back in horizontal sections
- Take ½-inch sections for precision
- Hold hair at 90-degree elevation (straight up)
- Point razor at 45-degree angle toward ends
- Use light, stroking motions moving down the hair shaft
- Cut each section to match the guideline length
- Check consistency by bringing sections together
Pro Tip: Use the razor in a broom-sweeping motion rather than sawing back and forth.
Step 4: Create Face-Framing Layers
Face-framing layers are essential to the wolf cut’s signature look.
Face-Framing Steps:
- Release hair around the face and sides
- Take diagonal sections angled toward the face
- Hold sections at 45-degree angle forward
- Cut shorter in front, longer toward back
- Start at cheekbone level for the shortest layers
- Use razor to create soft, feathered edges
- Blend into the top layers smoothly
Step 5: Cut the Side Sections
Side sections connect the top to the back while maintaining volume.
Side Section Technique:
| Step | Action | Angle | Result |
|---|---|---|---|
| 1 | Release side sections | Natural fall | See true length |
| 2 | Take vertical subsections | 45-90° elevation | Creates layers |
| 3 | Match to top guideline | Pull up and out | Seamless blend |
| 4 | Razor through mid-lengths to ends | 45° angle | Soft texture |
| 5 | Check both sides for symmetry | Natural fall | Balanced cut |
Step 6: Cut the Back Sections
The back creates the length retention and mullet-inspired element.
Back Cutting Process:
- Decide back length (shoulder length or longer typical)
- Work in horizontal sections from top to bottom
- Use lower elevation (45 degrees or less) for length retention
- Razor through ends to create soft, disconnected texture
- Create more graduation at the crown, less at the nape
- Leave nape area longest for true wolf cut effect
Step 7: Blend and Connect All Sections
Seamless blending is what makes a wolf cut look professional.
Blending Techniques:
- Take vertical sections across different zones
- Check for any harsh lines or disconnection
- Use razor to soften transitions between lengths
- Pull hair at various angles to find uneven areas
- Recut any sections that don’t flow naturally
- Focus on the horseshoe area where top meets sides
Step 8: Texturize and Finish
The final texturizing creates the signature shaggy wolf cut appearance.
Texturizing Method:
- Go through all layers with the razor
- Use point razor technique on ends
- Create choppy, piece-y texture throughout
- Pay extra attention to thicker areas
- Remove additional weight where needed
- Check texture in dry state before finishing
Razor Techniques for Different Wolf Cut Variations
Classic Wolf Cut
- Heavy layers throughout
- Moderate length in back (shoulder-length)
- Balanced proportions between top and bottom
- Chunky texture with visible layers
Long Wolf Cut
- Maintains more length overall (past shoulders)
- Longer face-framing pieces
- Subtle layering to preserve length
- Textured ends for movement
Short Wolf Cut
- Cropped length overall (chin to shoulder)
- Dramatic short layers on top
- Edgier, punkier aesthetic
- Maximum volume at crown
Subtle Wolf Cut
- Softer layering throughout
- Less dramatic length difference
- More blended appearance
- Professional-friendly version
Common Mistakes When Cutting Wolf Cuts with a Razor
Avoid these pitfalls for better results.
| Mistake | Problem Created | Solution |
|---|---|---|
| Cutting on dry hair | Damage, split ends, uneven texture | Always work with damp hair |
| Over-razoring | Too thin, straggly appearance | Use light pressure, fewer passes |
| Dull razor blades | Pulling, damage, poor results | Change blades frequently |
| Wrong angle | Disconnected, unflattering layers | Maintain consistent 45-90° angles |
| Skipping sections | Uneven, patchy appearance | Work methodically through all areas |
| Too much length difference | Unflattering proportions | Keep top/back ratio balanced |
| Neglecting face shape | Unflattering result | Customize layers to face shape |
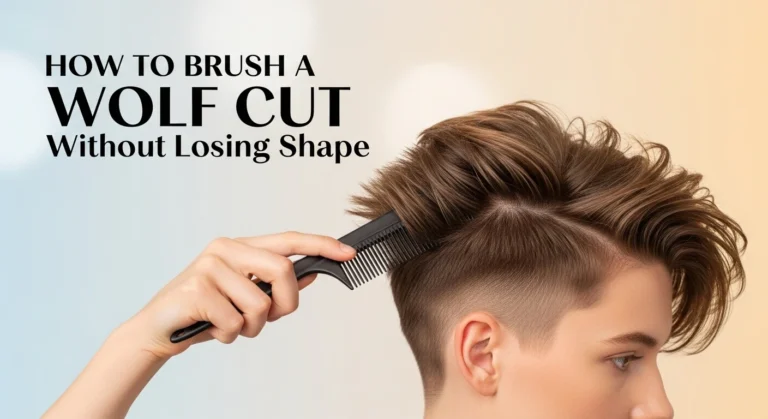
Styling Your Razor-Cut Wolf Cut
Proper styling enhances the textured, effortless vibe of a wolf cut.
Daily Styling Routine
- Apply texturizing spray to damp hair
- Rough-dry with fingers for natural volume
- Use diffuser on curly or wavy hair
- Add styling cream for piece-y definition
- Finish with dry texture spray for hold
Recommended Products
| Product Type | Purpose | Application |
|---|---|---|
| Sea salt spray | Enhances texture and waves | Spray on damp hair |
| Texturizing mousse | Adds volume and hold | Apply to roots before drying |
| Styling cream | Defines pieces and reduces frizz | Work through mid-lengths to ends |
| Dry shampoo | Refreshes and adds grit | Spray at roots on day 2-3 |
| Hair oil | Smooths ends, adds shine | Small amount on ends only |
Styling Variations
Sleek Wolf Cut:
- Blow dry smooth with paddle brush
- Use straightening iron on face-framing pieces
- Apply smoothing serum for polish
Messy Wolf Cut:
- Air dry or diffuse naturally
- Scrunch with texturizing product
- Embrace the undone, bedhead look
Voluminous Wolf Cut:
- Blow dry with round brush at roots
- Use volumizing mousse
- Tease crown section lightly
Wolf Cut Maintenance and Touch-Ups
Regular maintenance keeps your wolf cut looking fresh.
Maintenance Schedule
| Timeframe | Maintenance Needed | Reason |
|---|---|---|
| 2-3 weeks | Trim face-framing layers | Grows fastest, loses shape quickly |
| 4-6 weeks | Overall shape refresh | Maintains layered structure |
| 8-10 weeks | Full wolf cut redo | Complete style maintenance |
At-Home Touch-Up Tips
- Invest in quality razor for home use
- Only trim face-framing pieces between cuts
- Point razor downward for safety
- Take small amounts at a time
- Don’t attempt major changes yourself
- Use mirror system to check all angles
Face Shape Considerations for Wolf Cuts
Customize the wolf cut to flatter different face shapes.
Face Shape Customization Guide
| Face Shape | Best Wolf Cut Approach | Layer Placement | Length Recommendation |
|---|---|---|---|
| Oval | Classic wolf cut works perfectly | Balanced layers throughout | Any length |
| Round | Add height at crown, longer face-framing | Start layers below chin | Medium to long |
| Square | Soften jawline with wispy layers | Concentrate around jawline | Medium length ideal |
| Heart | Balance wider forehead | More volume at chin level | Medium to long |
| Long/Oblong | Add width with layers | Concentrate at ear level | Shorter to medium |
| Diamond | Highlight cheekbones | Frame cheekbones prominently | Any length |
Razor Safety and Best Practices
Prioritize safety when working with razors.
Safety Guidelines
- Use professional-grade razors with guards
- Change blades frequently (every 3-5 cuts)
- Never rush the cutting process
- Angle razor away from scalp
- Keep first aid kit nearby
- Work in good lighting conditions
- Maintain clean, sanitized tools
Blade Maintenance
- Sterilize before each use with barbicide or alcohol
- Dispose of dull blades properly in sharps container
- Store razors safely when not in use
- Keep blades dry to prevent rust
- Replace guards if damaged
Wolf Cut FAQ: Razor Cutting Edition
Can you cut a wolf cut with just a razor?
Yes, you can cut an entire wolf cut with only a razor. However, many stylists prefer using scissors for initial length removal and the razor for texturizing and detail work. This combination approach often yields the most controlled results.
Is a razor or scissors better for wolf cuts?
Razors create softer, more textured edges perfect for the shaggy wolf cut aesthetic, while scissors provide more precision and control. For the signature wolf cut texture, razors are generally preferred, especially for fine to medium hair types.
How often should I sharpen or replace razor blades?
Replace disposable razor blades every 3-5 haircuts for optimal performance. Dull blades pull hair rather than cutting cleanly, causing damage and poor results. Always have extra blades on hand.
Can I cut my own wolf cut with a razor?
While possible, cutting your own wolf cut with a razor is challenging due to the multiple angles and sections involved. If attempting at home, start conservatively, use a quality razor with a guard, and consider having someone help with the back sections.
Does razor cutting damage hair?
When done correctly on damp hair with sharp blades, razor cutting doesn’t damage hair more than scissors. However, using dull blades, cutting dry hair, or over-razoring can cause split ends and breakage. Proper technique is essential.
What type of razor is best for cutting wolf cuts?
A feather razor or straight razor with a guard is ideal for wolf cuts. These professional-grade tools provide control and safety while creating the desired texture. Avoid using disposable face razors or unguarded straight razors without proper training.
How long does a razor-cut wolf cut last?
A razor-cut wolf cut typically needs refreshing every 4-6 weeks to maintain its shape and texture. Face-framing layers may need trimming every 2-3 weeks as they grow fastest and impact the overall look.
Can you razor cut all hair types?
Razor cutting works best on fine to medium, straight to wavy hair. Thick or very curly hair may require alternative techniques or more careful approach. Coarse hair can become frizzy if over-razored, so proceed cautiously.
Troubleshooting Common Wolf Cut Issues
Problem: Too Much Volume at Crown
Solution:
- Use thinning shears to remove additional bulk
- Razor through crown area with light pressure
- Style with smoothing products
- Consider lowering crown layers slightly
Problem: Not Enough Texture
Solution:
- Go back through with razor at 45-degree angle
- Add point cutting to ends
- Use stronger texturizing products
- Create more disconnection between layers
Problem: Uneven Sides
Solution:
- Section hair vertically and compare lengths
- Adjust shorter side to match longer side
- Check natural part and head shape
- Account for cowlicks or growth patterns
Problem: Too Thin/Straggly Appearance
Solution:
- This indicates over-razoring
- Avoid additional razor work
- Use thickening products
- Let hair grow out 4-6 weeks before correction
- Consider adding extensions if severe
Professional vs. DIY: When to See a Stylist
See a Professional For:
- Your first wolf cut
- Major hair transformations
- Correcting mistakes
- Complex color and cut combinations
- If you have thick, curly, or difficult hair
- When working with the back of your head
DIY Maintenance Appropriate For:
- Minor face-framing touch-ups
- Refreshing existing wolf cut texture
- Small adjustments between appointments
- If you have experience with razors
- When using proper tools and techniques
Conclusion: Mastering the Razor Wolf Cut
Cutting a wolf cut with a razor requires practice, patience, and proper technique, but the results are worth the effort. The razor’s ability to create soft, textured, lived-in edges makes it ideal for achieving the signature shaggy aesthetic that defines this trending style.
Key Takeaways:
- Always work with damp hair and sharp razor blades
- Section hair properly for even, consistent results
- Use 45-90 degree angles depending on desired layer intensity
- Create shorter top layers and longer back lengths for classic wolf cut proportions
- Customize face-framing layers to flatter individual face shapes
- Blend thoroughly between sections for seamless transitions
- Texturize throughout for that signature shaggy finish
- Maintain every 4-6 weeks to preserve the style
Whether you’re a professional stylist expanding your skills or someone attempting a DIY wolf cut at home, understanding proper razor techniques will help you achieve that effortlessly cool, rock-and-roll vibe. Remember to start conservatively—you can always cut more, but you can’t put hair back!

Alex Morgan is a professional hairstylist and hair trends enthusiast with over 8 years of experience in modern and classic cuts. Specializing in the wolf cut haircut for all hair types, Alex has worked with clients across the USA to create effortlessly stylish, face-framing looks that blend texture with volume.